
CAPTURING THE 100-METER SPRINT
Recording a 100-meter sprint requires more than just setting up a camera and pressing record. When the goal is to carefully analyze performance, proper preparation becomes essential. Here, I’ll share how we organized the recording for sprint analysis at our school.
CONTENT OVERVIEW
1. SETTING THE LOCATION
2. START SIGNAL
3. SETTING UP THE RUNNERS
5. CONCLUSION
1. SETTING THE LOCATION
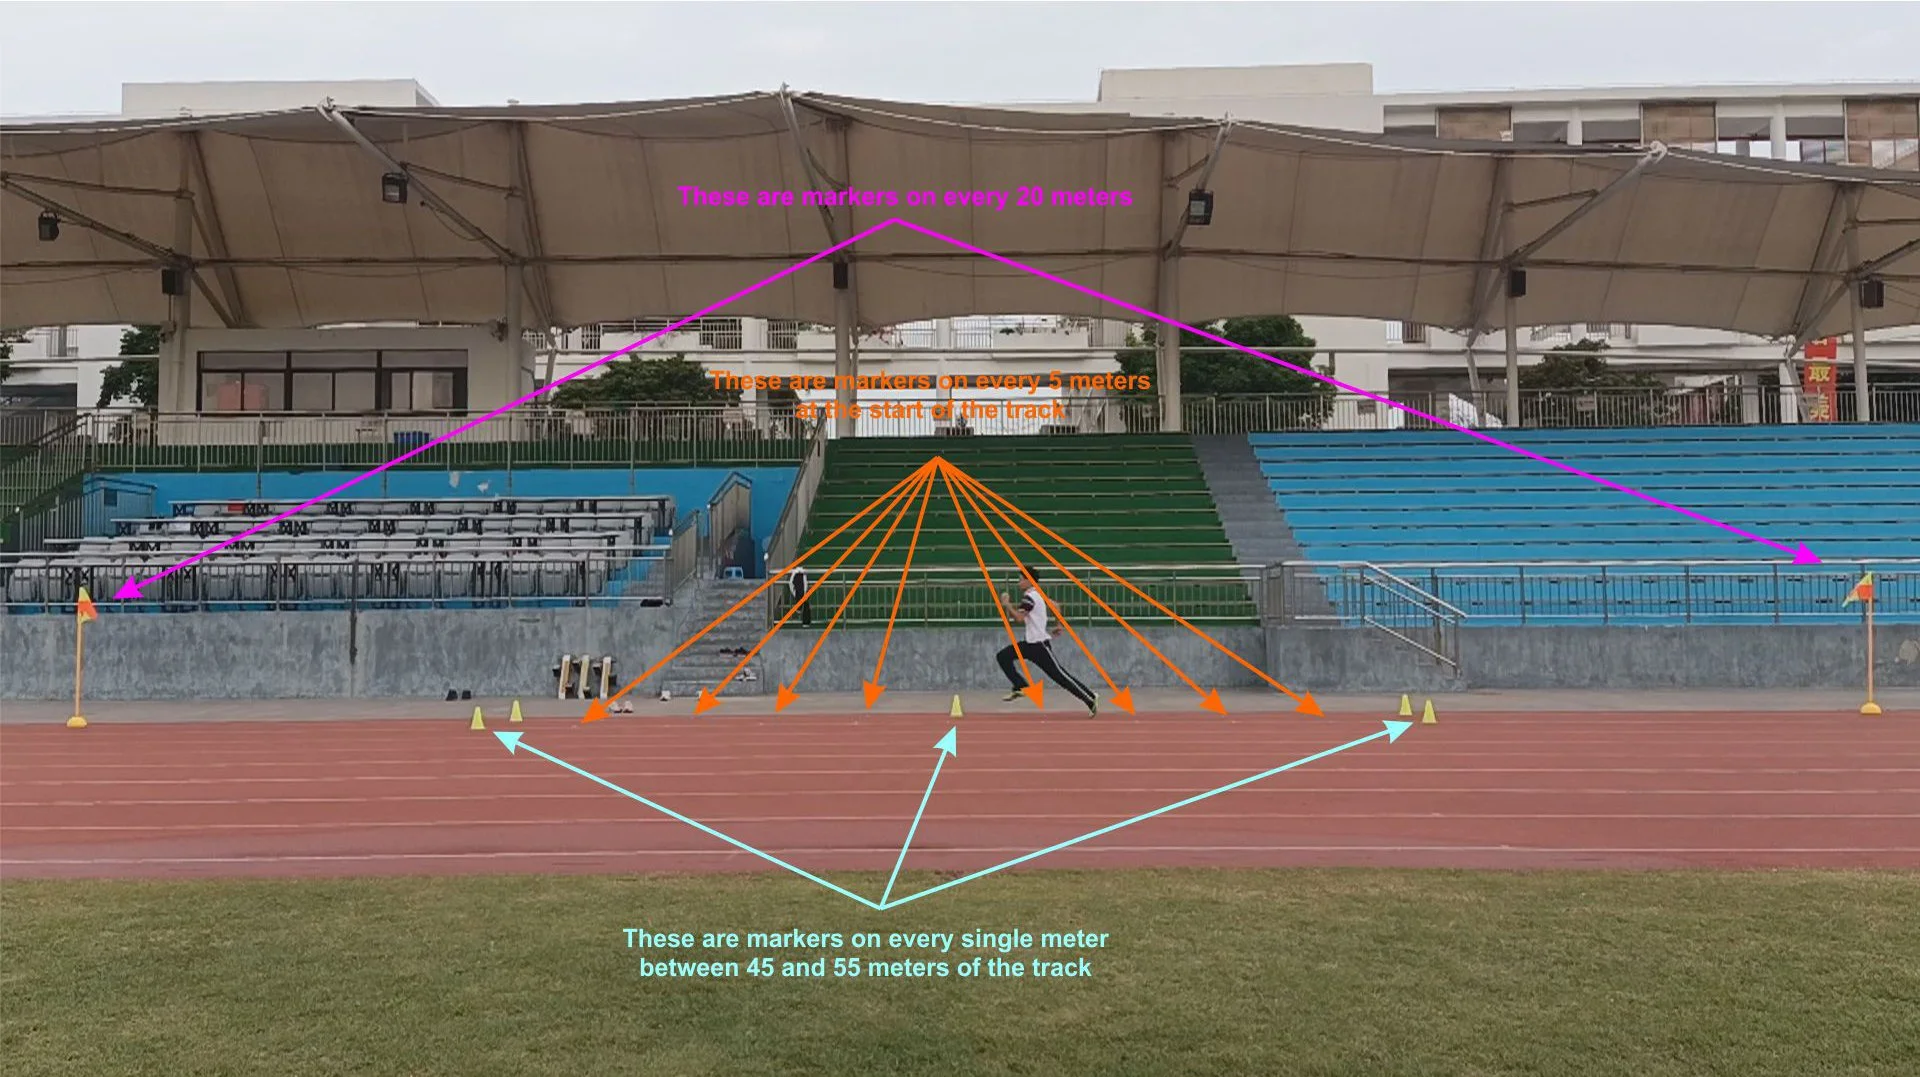
The first step is the track itself. It should be safe, free of obstacles, and provide enough space for placing cameras. Good positioning ensures that every detail we want to study is visible in the recordings.
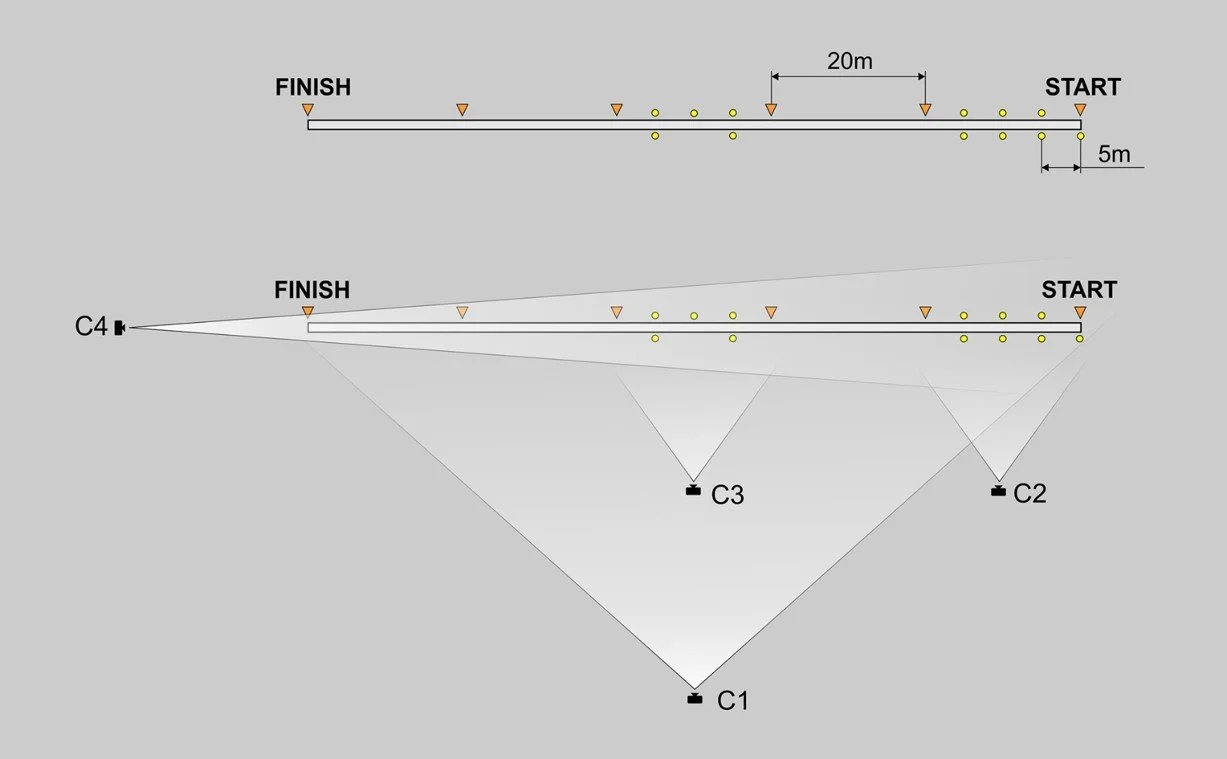
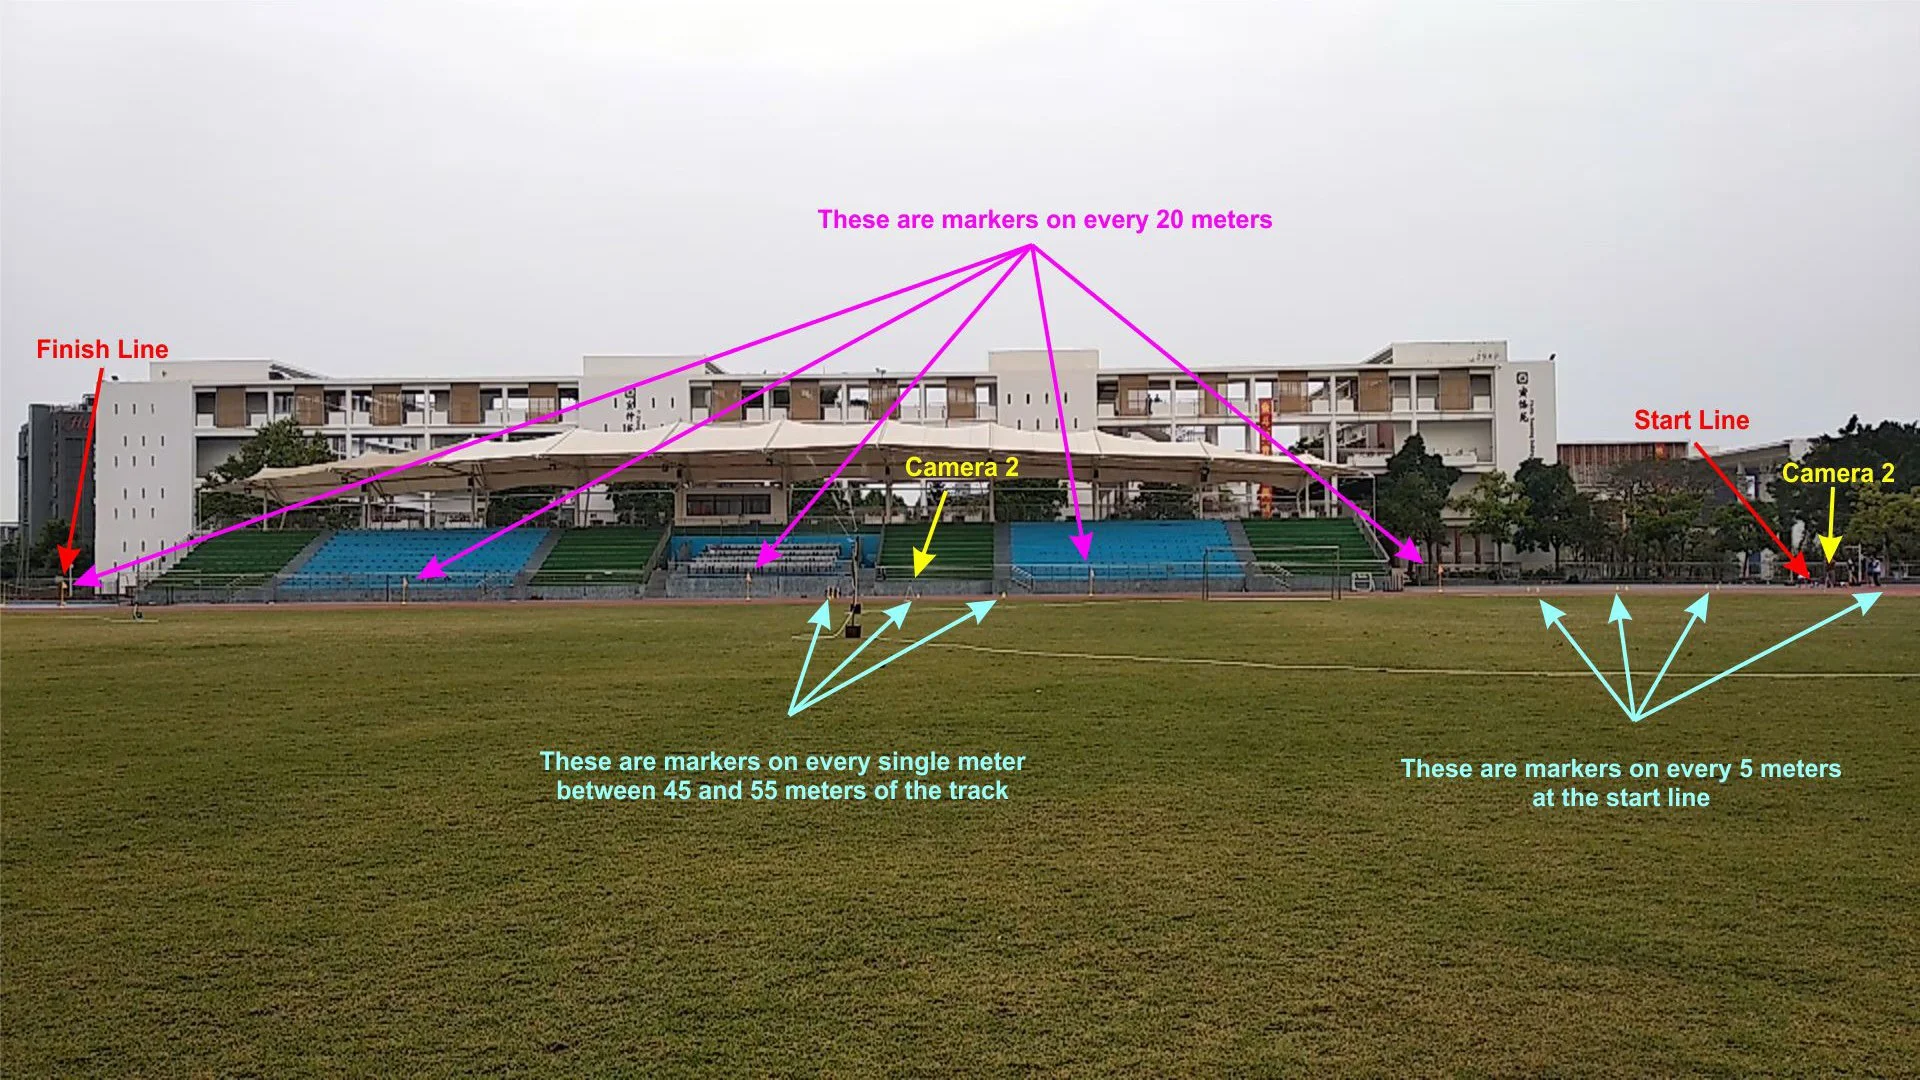
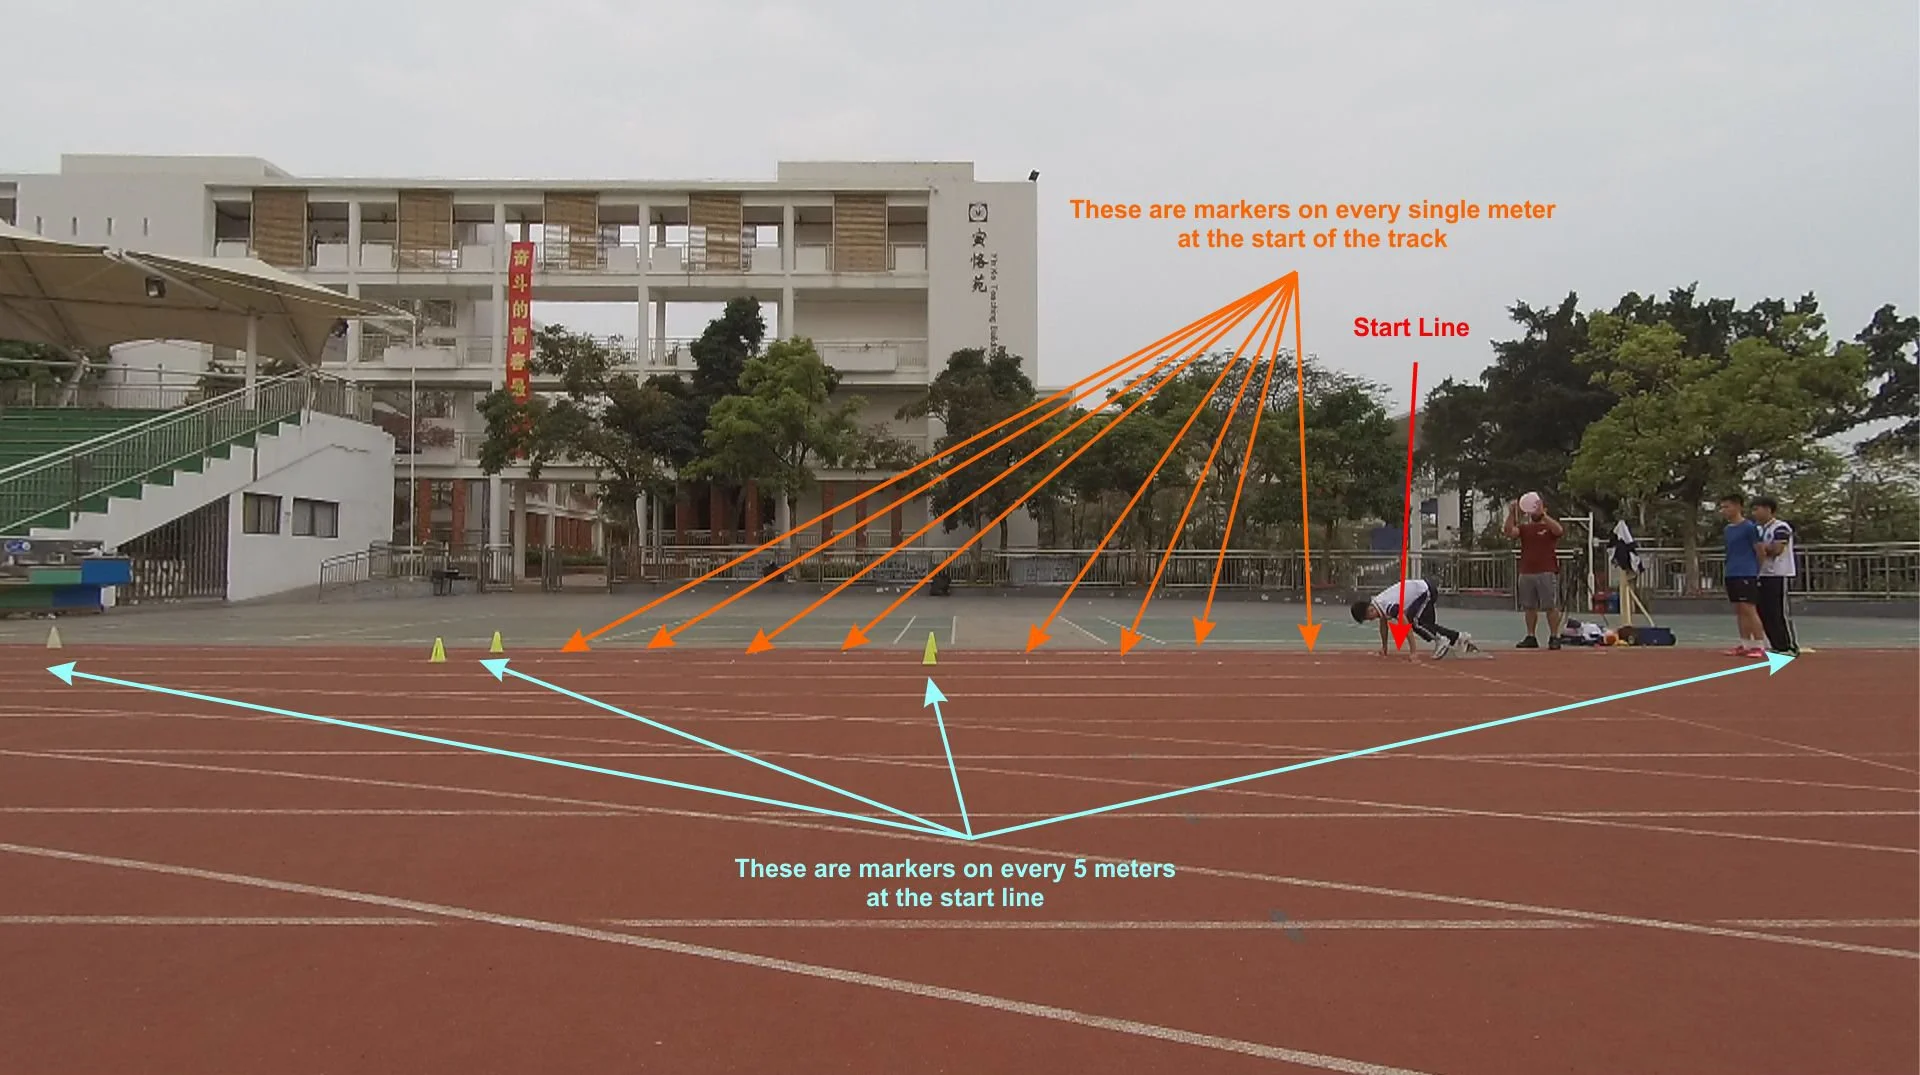
In the image above, you can see how the cameras and markers were arranged. Each marker was placed precisely so that later, distances could be measured accurately from the footage. For this setup, we used four cameras:
C1 – Filmed the entire track. This view was useful for calculating running speed across the full distance and at specific intervals.
C2 – Focused on the first 10 meters. The footage provided insight into starting technique and early acceleration.
C3 – Covered the middle section of the track. This view helped us analyze running stride as a cyclic motion and collect stride-related data.
C4 – Captured the entire track from the front perspective. Its view was aligned with both the markers and C3’s footage to support calibration.
The setup can always be adjusted. Different analysis goals may call for changes in camera positions, distances, or marker placement.
Lighting is another important factor. Natural daylight usually works best, but strong shadows across the lanes should be avoided, as they can make key details harder to see in the recordings.
C1 view
C2 view
C3 view
C4 view
Above are sample views from each camera, with details that were most important for our analysis.
2. START SIGNAL
Normally, the start of a sprint is given with a sound signal, such as a starter pistol. In professional setups, this method works well for synchronizing footage from different cameras, because the cameras are digitally connected and can be aligned to the same timeline. In our case, however, the cameras were not linked together, so we had to find another solution.
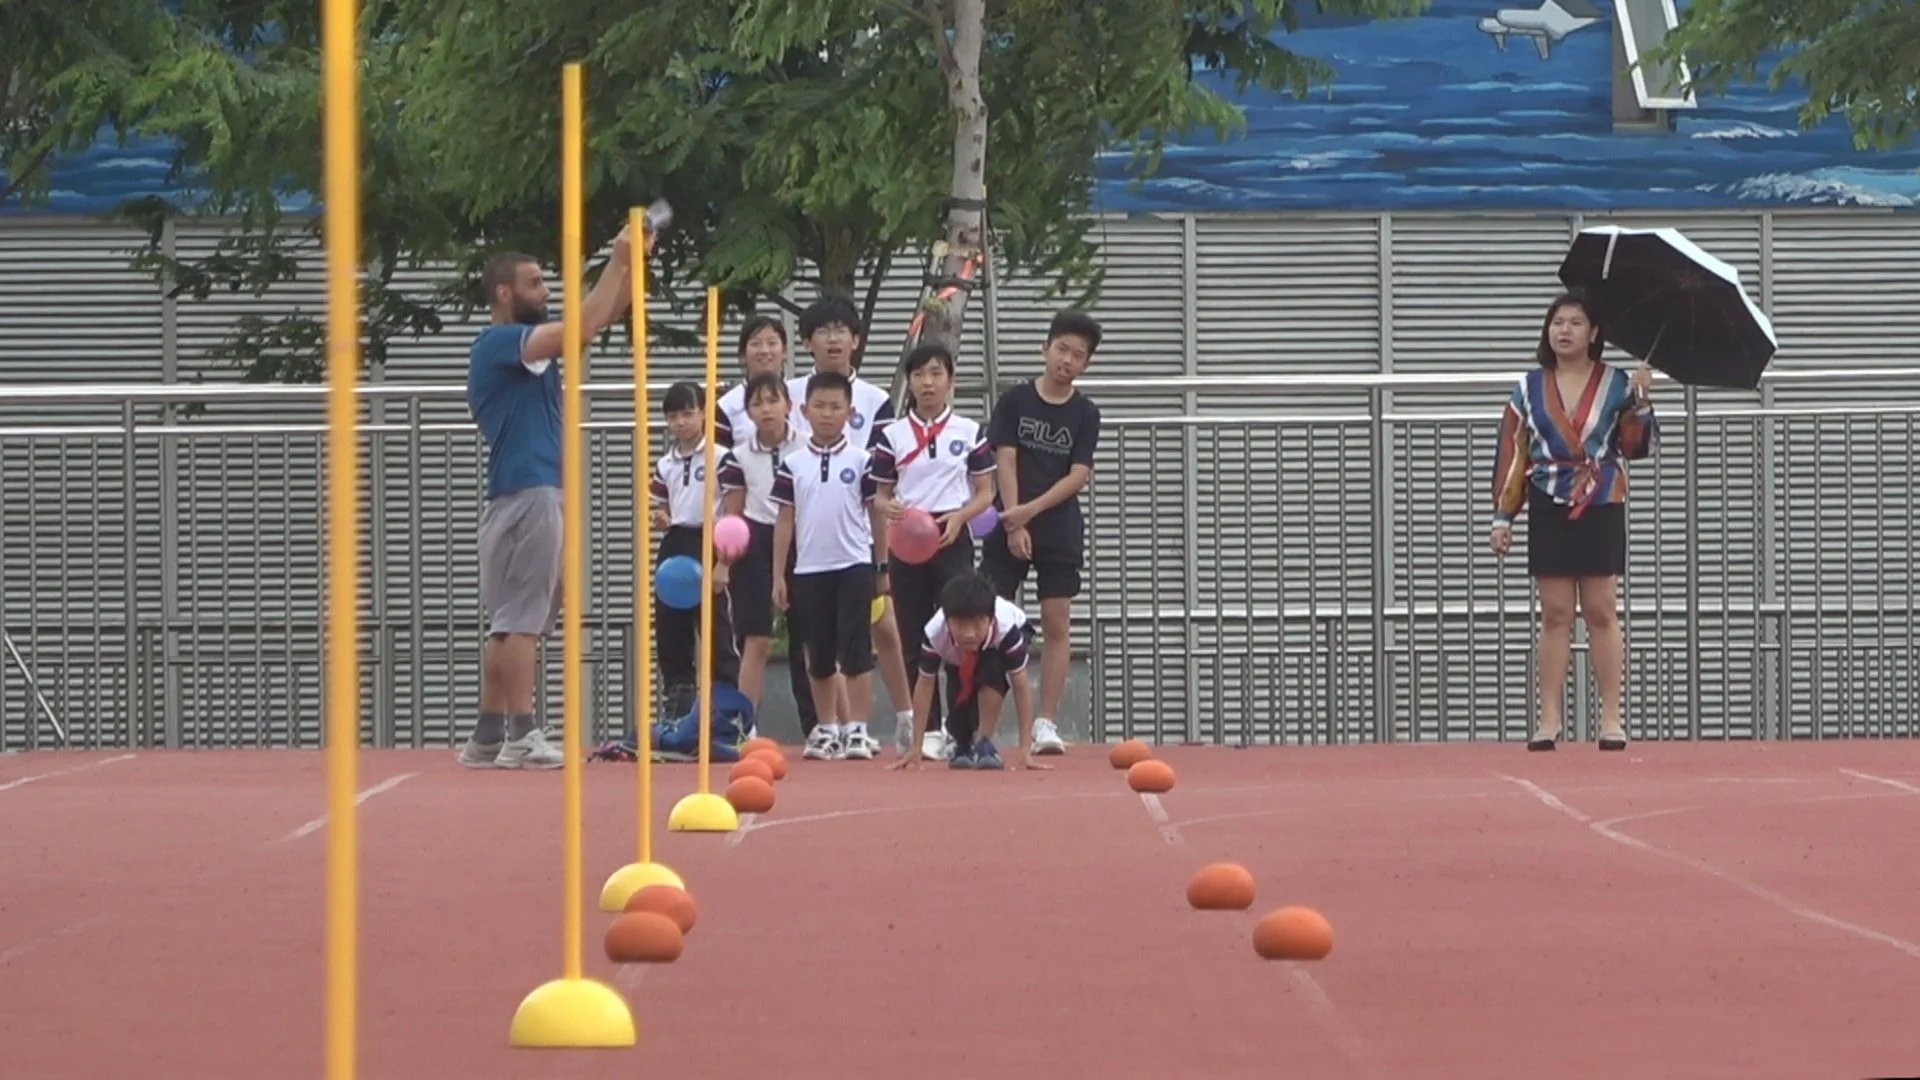
To synchronize all cameras, we used a simple trick: popping a balloon as the start signal. Unlike sound from a distance—which reaches each camera at slightly different times—the balloon pop created a clear visual cue that all cameras could capture in the same frame, no matter how far away they were placed.
The balloon pop gave the runners the same type of start signal as usual, while also providing us with an exact reference point to align the footage from each camera. This allowed us to synchronize the timing across all videos and keep the analysis accurate.
3. SETTING UP THE RUNNERS
Once all the cameras and markers were ready, the next step was organizing the students for recording.
To be efficient and minimize recording time, students were arranged in a line, with each assigned a number corresponding to their starting position. This numbering system later helped us organize and present the results.

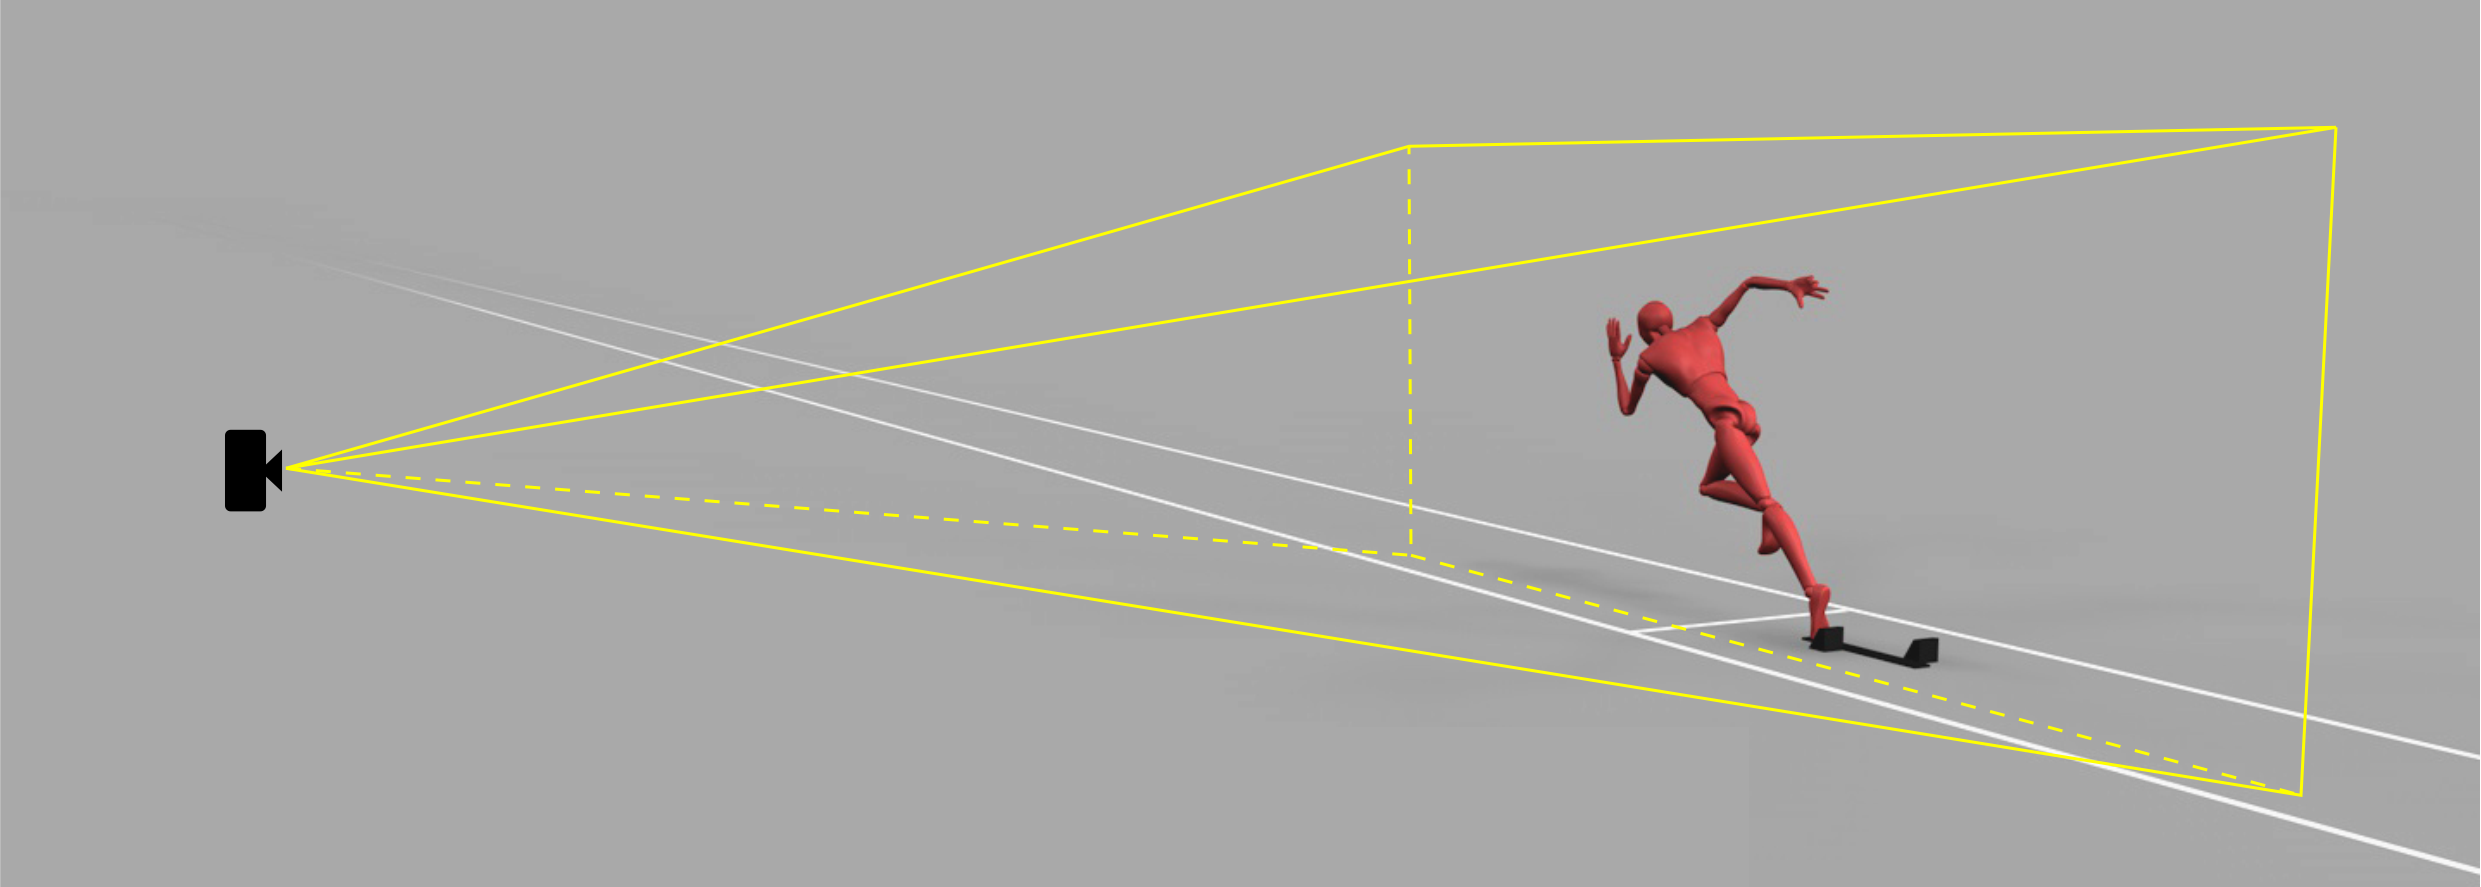
We also created a 3D setup to help students understand and manage the recording process, so they could see how their positions related to the cameras and the track.

It was important to explain factors that could affect recording accuracy, such as standing outside a camera’s frame or blocking its view.
With these preparations and explanations, the first recording went smoothly, and the process was successful.
4. CONCLUSION
Recording a 100-meter sprint with careful preparation not only improves accuracy but also brings innovation to teaching and coaching. Using creative solutions—like balloon pops for start signals or 3D setups to guide students—helps teachers and coaches visualize performance, provide better feedback, and make the learning process more engaging. This approach turns a simple sprint into a powerful tool for analysis and skill development.